
Meetings are the heartbeat of self-organising teams. In Nestr, structured meetings help your team coordinate work, process tensions, and evolve your governance — all in a focused, time-boxed format.
This guide covers everything you need to run effective meetings in Nestr: circle (tactical) meetings, governance meetings, and role meetings.
Nestr supports three types of meetings:

It is also possible to start a meeting using the '+ Create' button in your navigation bar on the left.

If your workspace has both circle and governance meetings enabled, you may see a meeting type selector with radio buttons to choose between them.
Instead of starting a meeting immediately, you can schedule it for later:
Scheduled meetings appear in your Meetings tab with a countdown showing "Meeting starts in..." and a Start meeting now link if you want to begin early. Team members can add agenda items to a scheduled meeting before it starts.
Most circles do not schedule a tactical meeting once, they run one every week, and a governance meeting every month or quarter. Set the repeat on the meeting rather than creating a new one each time: open Dates & Schedule on the scheduled meeting and choose how often it comes back.
Nestr keeps the next occurrence ready, so there is always a meeting for people to add agenda items to, and each occurrence keeps its own agenda, attendance and minutes. Moving or cancelling one week asks whether you mean that occurrence or the whole series, so skipping a public holiday does not disturb the rest. See Recurring meetings and tasks.
Role meetings are not enabled by default. A workspace admin can enable them by navigating to Workspace settings → Applications and toggling on role meetings. Once enabled, who can start, edit, or close meetings can be tuned per role on the Pro plan through rights management.
Once enabled:
You don't have to wait until the meeting starts to add agenda items. Nestr lets you prepare tensions (agenda items) in advance:

Prepared tensions appear in a Prepared tensions list section below the agenda during an open meeting. You can add them to the active meeting by clicking Add to agenda, or remove them with Remove from agenda.
Once a meeting is started, Nestr guides you through a structured set of tabs. Here's what each step covers:
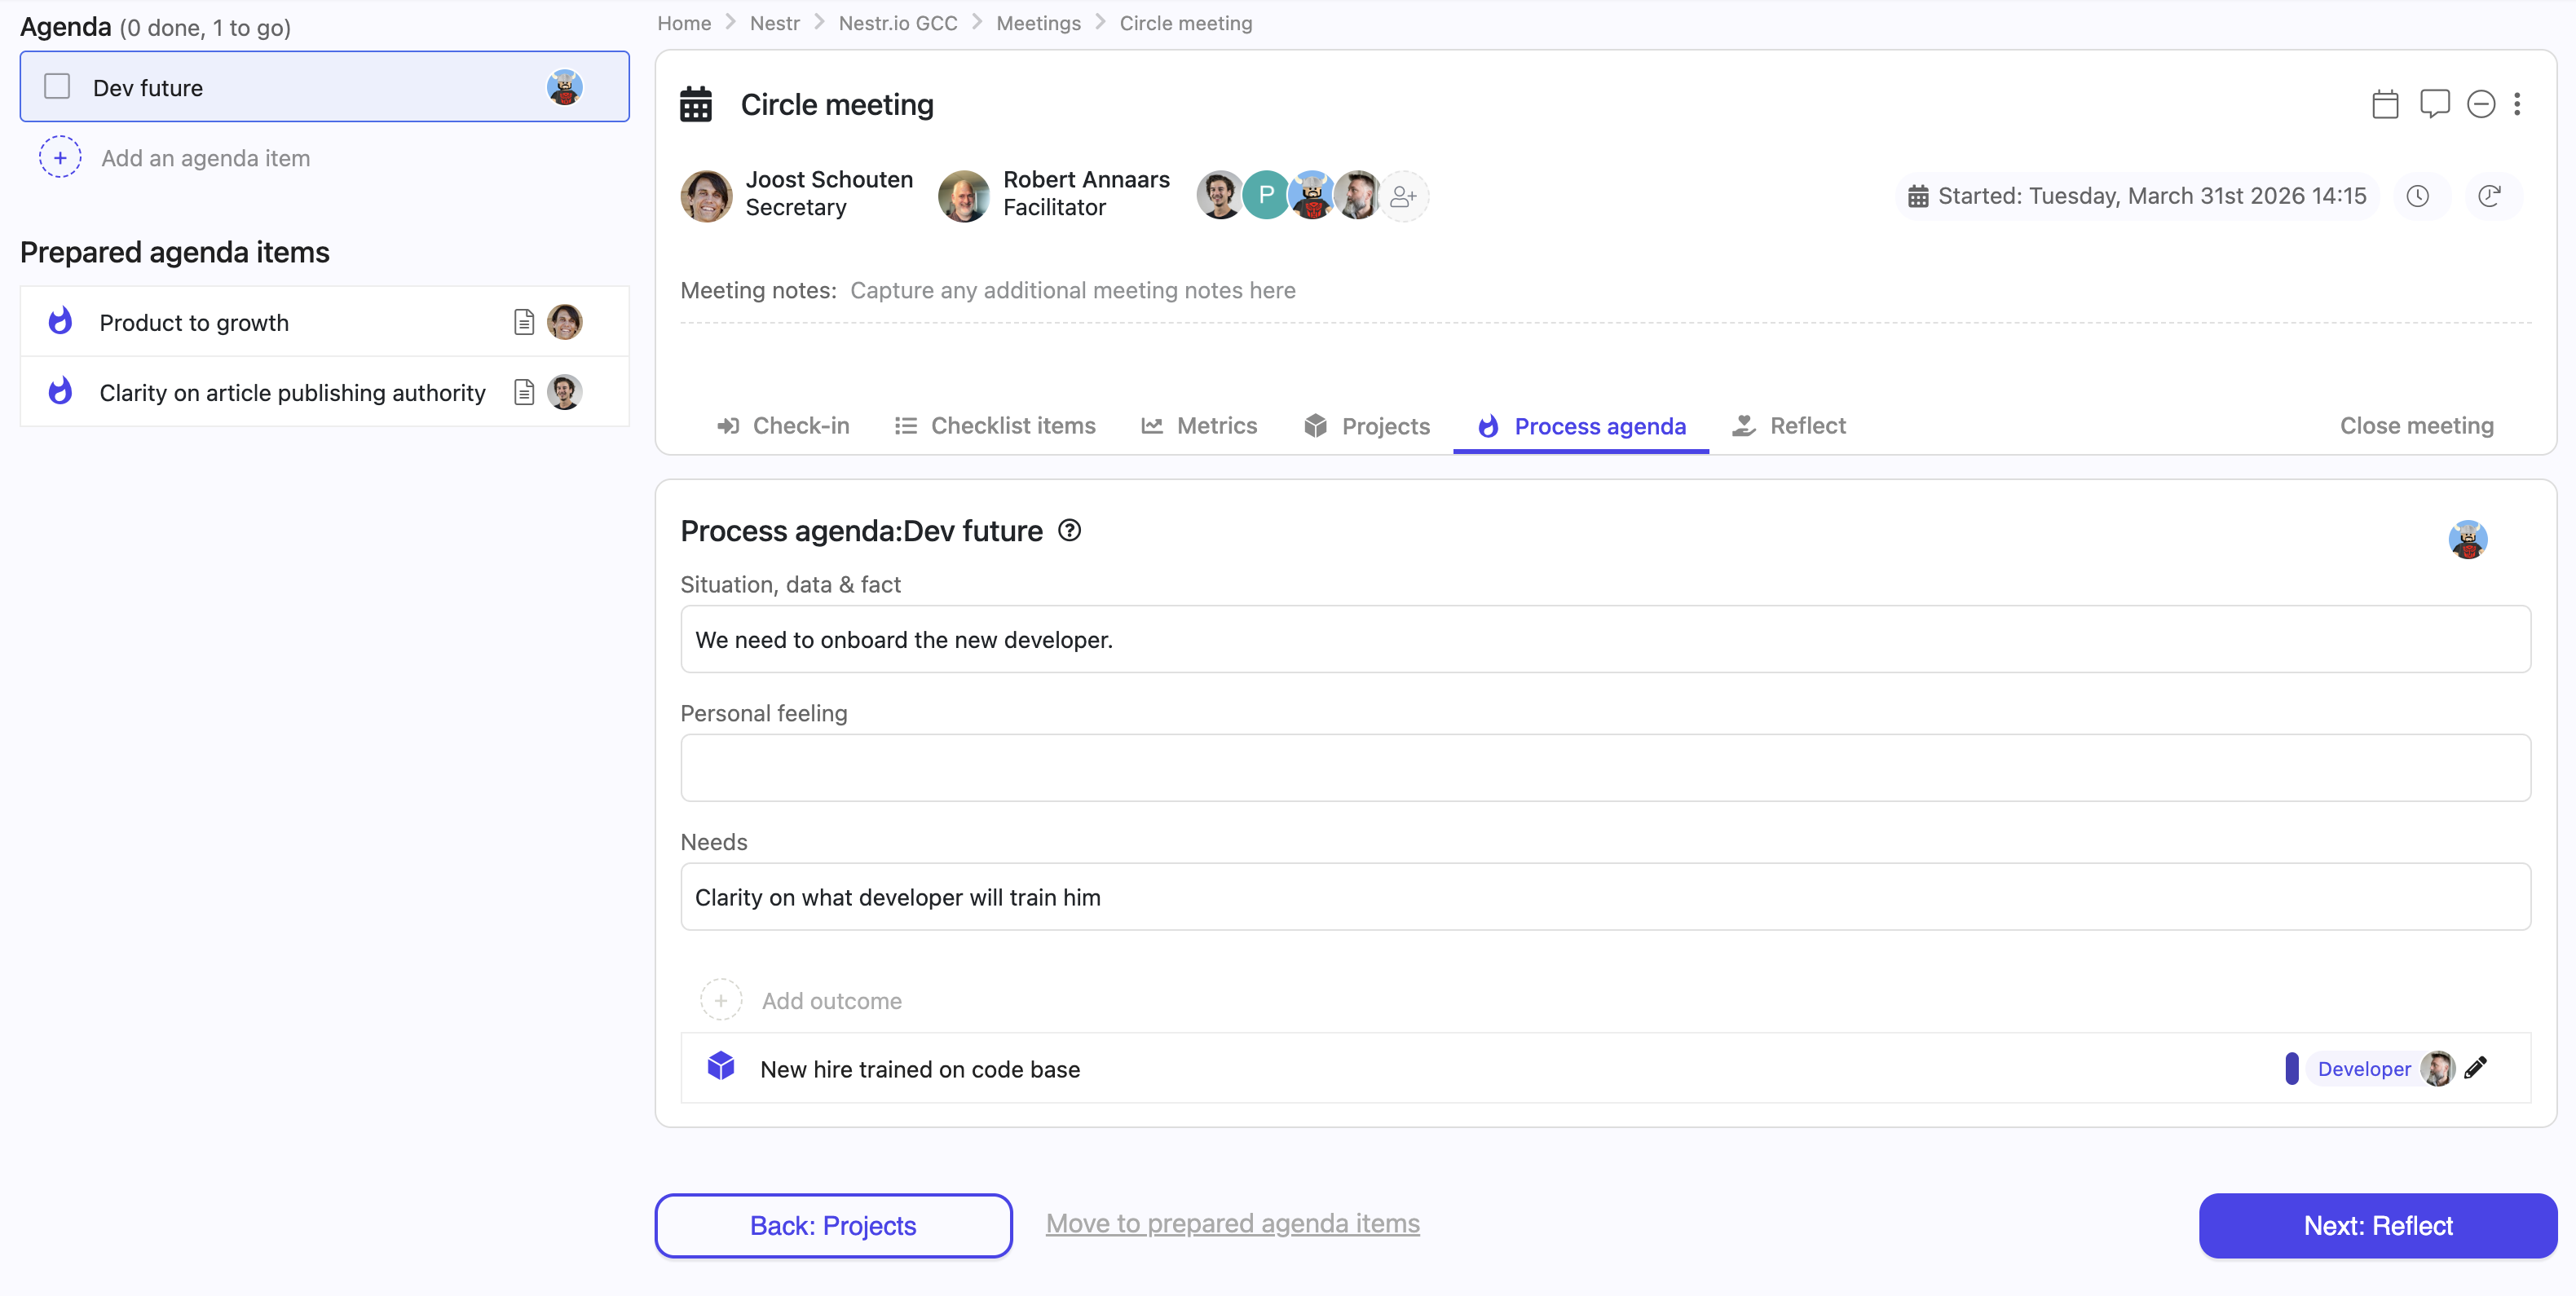
Governance meetings follow a similar structure but with a different processing step:

Anyone in the meeting can add agenda items to the meeting simply by typing in the 'Add an agenda item...' section in the left top. It will auto assign it to the user adding the agenda item. If there are prepared agenda items, you can simply drag them from the prepared list, onto the agenda to add them to the meeting. You can also open them from the prepared list, edit them if needed, and use the 'Add to agenda' button at the bottom to add them to the meeting agenda.
If you are capturing for someone else (if you are the Secretary for example), you can simply use @name... in the agenda item to assign it to another user. You can also use the ... when you hover over the agenda item and choose the Assign

You can remove an agenda item simply by backspacing the title of the agenda item and remove it from the meeting or you can use the context menu found under the ... on the item to remove it.

You can always drag the agenda items around to change the order in which they will be processed.
The Process agenda tab is where the real work happens. For each agenda item:
Outcomes cover actions, projects and proposals. Sometimes there is nothing to assign and you only want a record of what was discussed or decided. Agenda items are tensions, so you can give every agenda item its own notes field by adding one to the tension label. A workspace admin goes to Workspace settings → Labels, Fields & Tabs, selects the tension label, and adds a multiline text field or an HTML text field called Notes. From then on every agenda item carries it. The same approach works for anything else you want to record per item, such as a decision, a discussion owner or a follow-up date. See Custom fields.
When all agenda items are processed, click the Close meeting tab to finalise:
Note: If a meeting is left open for more than 8 hours without activity, Nestr will automatically close it and send the email report.
If a governance meeting removed a role, circle or policy, the report keeps it visible. Hover over the removed item to view it as it was just before removal. See governance lookback.
You can save any meeting as a PDF, before or after it is closed. Open the ... menu at the top of the meeting page and choose Download as PDF.
Nestr captures the meeting page as it appears on your screen, including the agenda, the outcomes for each item and your meeting notes, and saves it as a multi-page A4 file named after the meeting. Expand anything you want included before you download, because collapsed sections are captured collapsed. This gives you a copy of the minutes to file or share outside Nestr, alongside the report that is emailed on close.
Elections for governance roles (circle lead, facilitator, secretary, rep link) are handled as part of governance proposals. During a governance meeting, you can create a proposal with the election label to nominate and elect someone into a governance role. The election follows your workspace's configured governance process (Holacracy IDM, Sociocracy consent, etc.).
You can change the available steps for your meeting by navigating to your Workspace settings -> Labels, fields & tabs. There you can select the Circle or Governance meeting label and change what tabs are visible or add custom tabs.
The same screen is where you add fields to meetings, agenda items and anything else in Nestr. See Custom fields.


.png)


